
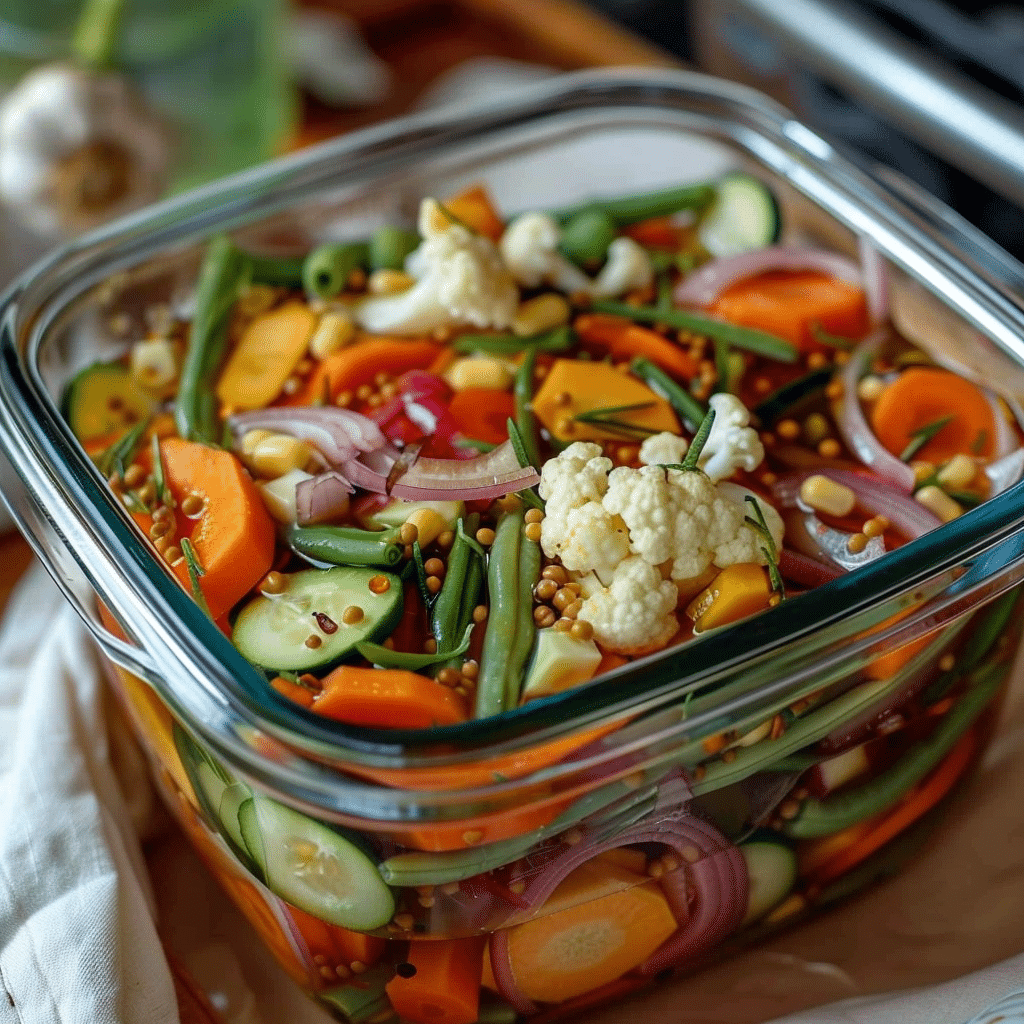
Refrigerator Pickled Vegetables are a fast, flexible way to enjoy crisp, tangy veggies without needing to can or sterilize jars. You simply prepare a quick hot brine, pour it over fresh vegetables, and let them chill. In just 24 hours, you have crunchy, flavor-packed pickles perfect for snacking, topping, or pairing with meals. This no-fuss method works with many firm vegetables and takes only 30 minutes of active prep. Whether you are a beginner or an experienced home cook, this simple process brings out bright flavors and fresh textures with almost no effort.
Why You’ll Love This Recipe
These quick pickled vegetables are refreshingly crunchy and boldly tangy. The hot brine gently softens the veggies just enough to soak in flavor while keeping their bite. You don’t need any special equipment or canning knowledge. The recipe is totally flexible with endless veggie combinations and spice variations. It’s a perfect way to preserve extra produce, reduce waste, and add a burst of flavor to any meal. You can make them spicy or mild, sweet or sharp, depending on your taste.
Ingredients You’ll Need
Here’s everything you need for a full batch of quick refrigerator pickles
Cauliflower Florets (2 cups)
Cauliflower adds a hearty bite and absorbs the brine well. Use small, even florets so they soften evenly.
Carrots (1 cup, sliced into coins)
Carrots provide sweetness and vibrant color. Slice thinly for quick pickling and crunch.
Cucumbers (1 cup, sliced 1/4-inch thick)
Use firm pickling cucumbers with small seeds. These stay crisp and soak up just the right amount of brine.
Red Bell Pepper (1 large, sliced)
This brings a mellow sweetness and bright color contrast. It softens slightly but remains crisp.
Green Beans (1 cup, trimmed)
Fresh green beans stay snappy and add a satisfying crunch to the mix.
Garlic (3 cloves, minced)
Garlic gives the brine depth and savoriness. Minced garlic works faster than whole cloves for infusing flavor.
Mustard Seeds (2 teaspoons)
These little seeds release a gentle spice and earthy aroma into the brine.
Black Peppercorns (1 teaspoon)
Whole peppercorns provide a background of heat and balance the vinegar’s acidity.
Red Pepper Flakes (1/2 teaspoon, optional)
Adds a bit of heat. You can adjust the amount or leave it out entirely.
White Vinegar (2 cups, 5% acidity)
This is the acid base for the pickling brine. It offers a clean, sharp flavor that preserves and brightens.
Water (2 cups)
Used to dilute the vinegar and soften the acidity for a balanced flavor.
Kosher or Pickling Salt (2 tablespoons)
Do not use iodized salt. Kosher or pickling salt helps preserve and season the vegetables cleanly.
Sugar (1 tablespoon)
Balances out the salt and acid with just a hint of sweetness. Adjust to your preference.
How to Make Refrigerator Pickled Vegetables
The process is fast and simple. Start by prepping your vegetables into even pieces. You’ll then boil a brine with vinegar, water, salt, and spices. The hot brine gets poured over the vegetables to kick-start the pickling process. Once it cools, you transfer everything into jars and refrigerate. After just a day, the vegetables take on bold, zesty flavor and stay crisp for weeks.
Step-by-Step Instructions
Step 1: Prep the Vegetables
Wash all vegetables thoroughly. Slice the carrots into coins, cut cucumbers into 1/4-inch rounds, break cauliflower into bite-sized florets, trim the green beans, and thinly slice the red bell pepper. Uniform pieces help everything pickle evenly.
Step 2: Make the Brine
In a medium saucepan, combine 2 cups white vinegar, 2 cups water, 2 tablespoons kosher salt, 1 tablespoon sugar, 3 minced garlic cloves, 2 teaspoons mustard seeds, 1 teaspoon black peppercorns, and 1/2 teaspoon red pepper flakes if using. Bring this mixture to a full boil over medium-high heat, stirring until the salt and sugar fully dissolve.
Step 3: Pour Brine Over Vegetables
Place all vegetables in a large, heatproof bowl. Pour the hot brine directly over them, making sure everything is submerged. Press gently with a spoon to help remove any air pockets and allow even soaking. Let the vegetables cool at room temperature for about 1 hour.
Step 4: Transfer to Jars
Once cooled, pack the vegetables tightly into clean glass jars. Use a ladle to pour the remaining brine over the vegetables, covering them fully. If the brine runs low, top off with a mix of equal parts vinegar and water to fill the jars.
Step 5: Seal and Refrigerate
Close the jars tightly and place them in the refrigerator. Let the pickles chill for at least 24 hours before tasting. They are best after 3 to 5 days and will stay good for 2 to 3 weeks when stored properly.
Helpful Tips
Use fresh, firm vegetables for the best texture and taste
Always keep vegetables fully submerged to prevent spoilage
Label each jar with the date for freshness tracking
Avoid plastic containers as vinegar can damage them and affect taste
Let the pickles sit at least 3 days for peak flavor
Details
Flavor: Tangy, mildly spicy, aromatic
Texture: Crunchy, snappy
Occasion: Ideal for side dishes, appetizers, snacks, and gifts
Prep Time: 20 minutes
Cook Time: 10 minutes
Chill Time: At least 24 hours
Total Time: 30 minutes active
Yield: 12 servings (fills 2 to 3 quart jars)
Notes (Optional Variations or Substitutions)
Add fresh dill sprigs or coriander seeds for extra depth
Use red onion, radishes, or asparagus in place of or alongside original vegetables
Increase sugar for a sweeter profile
Add sliced jalapeños for extra heat
Use apple cider vinegar for a fruitier tang
Nutritional Information (Per Serving)
| Nutrient | Amount |
|---|---|
| Calories | 35 kcal |
| Fat | 0 g |
| Protein | 1 g |
| Carbohydrates | 7 g |
| Sugar | 3 g |
Frequently Asked Questions
Can I use different vegetables than the ones listed?
Yes, this brine works well with many firm vegetables like radishes, asparagus, jalapeños, red onions, or broccoli florets. Just make sure the veggies are fresh and crisp.
Why pour the brine over hot?
The hot brine slightly softens tougher vegetables like carrots and cauliflower so they can absorb the pickling liquid faster. It ensures better texture and flavor distribution.
Is this canning? Are the pickles shelf-stable?
No. This is not a canning method. These pickles are not shelf-stable and must be stored in the refrigerator at all times.
Why did my garlic turn blue or green?
This is a harmless chemical reaction between garlic enzymes and the vinegar’s acid. It may look odd, but the garlic is completely safe to eat and the flavor is unchanged.
Storage Instructions
Keep all jars in the refrigerator once filled. These quick pickles are ready after 24 hours and best enjoyed within 2 to 3 weeks. Always use clean utensils when removing vegetables from the jar to avoid contamination. Discard the batch if the brine turns cloudy or the vegetables smell off.
Related Recipes (With Internal Links)
Looking for fun and flavorful pairings? These recipes from Richy Bites go great with pickled vegetables
Amish Harvest Casserole – The Ultimate Fall Comfort Classic
Spinach Dip Graveyard Scene – A Halloween Party Favorite
Ghost Taco Hand Pies – Spooky and Savory Halloween Delight
Hello Fresh Bulgogi Sauce Recipe
Mexican Street Corn Recipe
Boat Dip Recipe
Pop-Tart Cookie Bars
Cookie Monster Ice Cream

Refrigerator Pickled Vegetables | Easy & Crunchy No-Canning Recipe
- Total Time: 30 minutes
- Yield: 12 servings 1x
- Diet: Vegan
Description
Bright, crunchy, and tangy vegetables pickled without canning. Perfect for snacking, side dishes, or layering onto sandwiches.
Ingredients
2 cups cauliflower florets
1 cup sliced carrots (coins)
1 cup sliced cucumbers (1/4-inch thick)
1 red bell pepper, sliced
1 cup green beans, trimmed
3 cloves garlic, minced
2 tsp mustard seeds
1 tsp whole black peppercorns
1/2 tsp red pepper flakes (optional)
2 cups white vinegar (5% acidity)
2 cups water
2 tbsp kosher or pickling salt
1 tbsp sugar
Instructions
1. Wash and prepare all vegetables, slicing and trimming into even, bite-sized pieces.
2. In a medium saucepan, combine vinegar, water, salt, sugar, garlic, mustard seeds, peppercorns, and red pepper flakes. Bring to a boil and stir until dissolved.
3. Place all vegetables in a heat-safe bowl and pour hot brine over them. Press down to submerge and cool for 1 hour.
4. Transfer vegetables to clean jars, covering fully with brine. Add more vinegar-water mix if needed.
5. Seal jars with lids and refrigerate for at least 24 hours before eating. Best after 3–5 days.
Notes
Swap in radishes, red onion, or asparagus for variety.
Add dill, coriander seeds, or bay leaves for more flavor.
Increase sugar for a sweeter pickle.
Always keep vegetables fully submerged and refrigerated.
- Prep Time: 20 minutes
- Cook Time: 10 minutes
- Category: Condiment, Side
- Method: Pickling
- Cuisine: American
Nutrition
- Serving Size: 1 serving
- Calories: 35
- Sugar: 3g
- Sodium: 350mg
- Fat: 0g
- Saturated Fat: 0g
- Unsaturated Fat: 0g
- Trans Fat: 0g
- Carbohydrates: 7g
- Fiber: 2g
- Protein: 1g
- Cholesterol: 0mg
Conclusion
This refrigerator pickled vegetable recipe is the easiest way to add crunch and bold flavor to your meals. You don’t need fancy tools or a long canning session. With a few fresh vegetables and a hot brine, you get reliable, delicious results every time. Try new veggie combos, play with spices, and make a batch to enjoy all week. If you make this recipe, share your version or leave a comment on the blog. Homemade pickles just might become your new favorite fridge staple.