
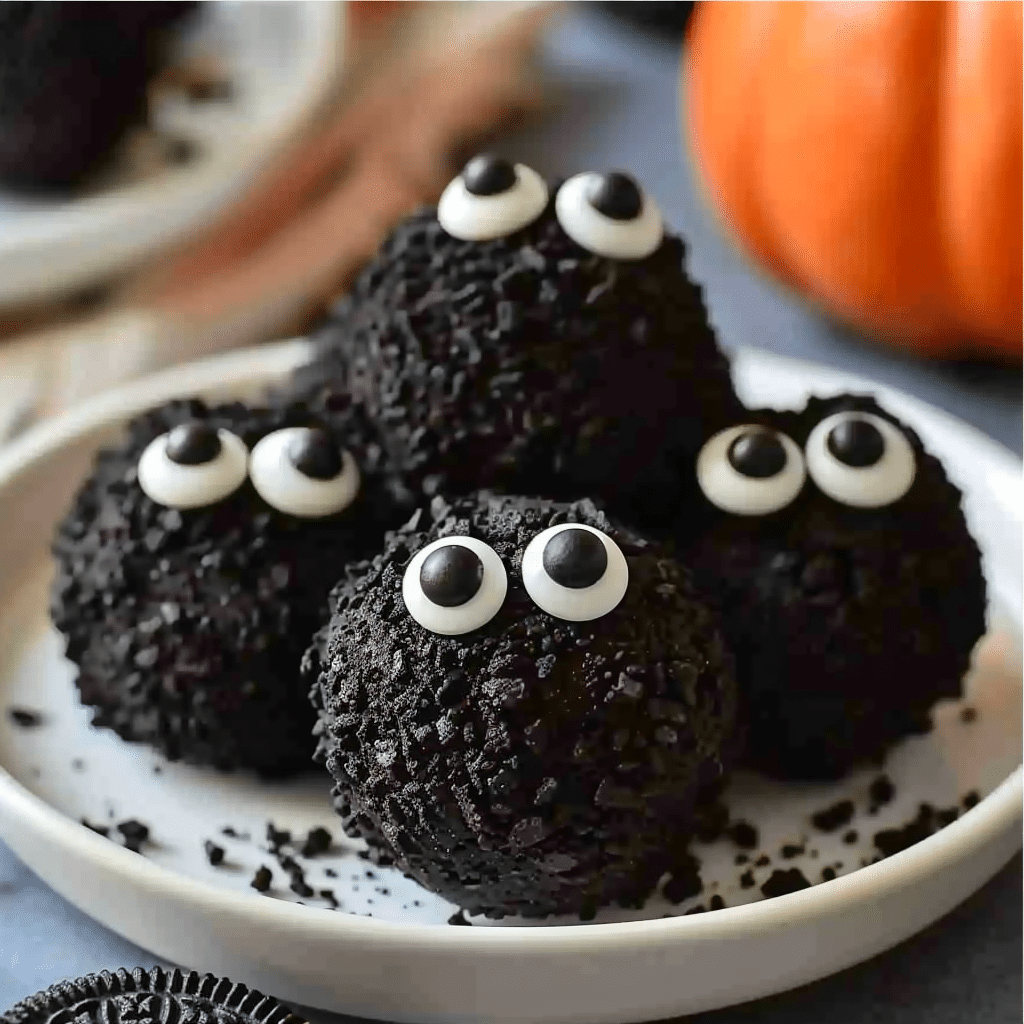
If you’re looking for the perfect no-bake Halloween treat that kids and adults will love, these Halloween Oreo Balls are a must-try. They’re made with just a few simple ingredients and come together fast, making them ideal for busy school mornings, spooky parties, or hands-on decorating with kids. You can turn them into mummies, pumpkins, ghosts, or monster bites using candy melts and fun toppings. Whether you’re packing snacks for a classroom event or adding flair to your Halloween dessert table, these Oreo balls are a fun and delicious way to bring chocolatey joy to the celebration.
This is the kind of treat that brings families together in the kitchen, sparks creativity, and disappears quickly at every gathering. Best of all, it’s a stress-free recipe you can make ahead, freeze, or whip up last minute without turning on the oven.
From the kitchen of Richy Bites and young chef Alessia, where we believe every meal should feel like a warm hug, this treat is Halloween joy in a bite.
Why You’ll Love This Recipe
Halloween Oreo Balls are a favorite for so many reasons. First, they are incredibly easy to make. With just a food processor, a bowl, and a few basic ingredients, you can create spooky and cute treats that look professionally made. There is no baking involved, which means less mess and no stress.
Second, they are a fantastic treat to make with kids. Little hands can help roll the dough, dip the balls, and decorate with candy eyes, colored chocolate, or Halloween sprinkles. Decorating is often their favorite part, and it encourages creativity and participation.
Finally, these Halloween Oreo Balls are versatile and fun. You can make ghosts with white candy coating, pumpkins with orange melts, or mummies with zigzag lines of drizzled chocolate. Whether you’re preparing them for a classroom snack, a family party, or simply a fun weekend activity, these treats will be a crowd-pleaser.
Ingredients You’ll Need
Here’s a breakdown of what you need to make Halloween Oreo Balls, with some helpful tips for substitutions or enhancements.
Oreo Cookies (36 regular or Halloween-themed)
This is the base of your Halloween Oreo Balls. Use classic chocolate Oreos or switch it up with Halloween-themed Oreos for orange-colored filling. You’ll crush the entire cookie, cream filling included, into a fine crumb. These provide both the texture and the flavor for the treat.
Cream Cheese (8 oz, softened)
This binds the crushed Oreos into a smooth dough and adds a creamy texture. Make sure your cream cheese is fully softened before mixing. You can also use a vegan substitute or dairy-free cream cheese if you want a plant-based version.
Candy Melts or White Chocolate Chips (12 oz, any Halloween color)
Candy melts are the easiest option for dipping, and they come in festive colors like orange, green, purple, black, and white. You can also use high-quality baking chocolate, but avoid chocolate chips because they don’t melt smoothly without added fat.
Candy Eyes, Halloween Sprinkles, Mini Chocolate Chips
These are your decorating essentials. Use candy eyes for a monster effect, sprinkles for color, or mini chips for texture and fun. Let kids pick their favorites to make it interactive and festive.
Gel Food Coloring (optional)
If you’re working with white chocolate and want to create custom colors, use gel-based food coloring. Avoid water-based dyes which can cause chocolate to seize.
Parchment Paper
Line your tray to keep the Oreo balls from sticking. It makes cleanup much easier and helps your dipped balls set neatly.
How to Make Halloween Oreo Balls
This recipe is designed to be simple and fun. Here’s a quick overview of how it all comes together before we jump into the detailed step-by-step.
You’ll crush the Oreos into fine crumbs, mix them with cream cheese to form a dough, roll them into balls, then freeze to firm them up. After that, dip in melted candy melts or chocolate and decorate right away while the coating is still wet. Chill until set and enjoy.
It’s as easy as that. Now let’s walk through the process in detail.
Step-by-Step Instructions
Step 1: Crush the Oreos
Place the Oreo cookies in a food processor and pulse until they become fine crumbs. If you don’t have a food processor, place the cookies in a zip-top bag and crush them using a rolling pin.
Step 2: Mix with Cream Cheese
Transfer the crushed Oreos into a mixing bowl and add softened cream cheese. Use a spoon or your hands to combine them into a smooth, thick dough. The mixture should come together easily and hold its shape.
Step 3: Roll into Balls
Scoop out about one tablespoon of dough and roll it into a 1-inch ball. Place each ball on a parchment-lined baking sheet. Continue until all the dough is used.
Step 4: Freeze Until Firm
Place the tray of Oreo balls into the freezer for at least 20 minutes. Chilling them ensures they don’t fall apart when dipped in melted chocolate.
Step 5: Melt the Chocolate
While the balls are chilling, melt your candy melts or white chocolate in a microwave-safe bowl. Heat in 30-second intervals, stirring in between, until smooth. If needed, add a teaspoon of coconut oil to improve the texture.
Step 6: Dip the Oreo Balls
Using a fork or toothpick, dip each chilled ball into the melted chocolate. Gently shake off the excess and place it back onto the parchment paper.
Step 7: Decorate Immediately
Before the coating sets, decorate each ball with candy eyes, sprinkles, mini chips, or icing. Let your creativity shine here. Try mummies with white drizzle, pumpkins with orange and green, or spooky ghosts with just candy eyes.
Step 8: Chill and Serve
Let the Oreo balls set completely in the refrigerator for at least 10 to 15 minutes. Once hardened, serve them chilled or bring to room temperature before eating.
Helpful Tips
- Always chill the balls thoroughly before dipping to prevent them from falling apart or crumbling into the coating.
- Use high-quality candy melts for the smoothest finish.
- If you’re using white chocolate, stir in a teaspoon of coconut oil to help it melt better and coat evenly.
- For school events, place the finished balls in mini cupcake liners and pack them with cold packs.
- Let kids participate in the decorating process. It’s a fun and festive activity that turns into dessert.
Details
Flavor:
Rich, chocolatey, and slightly tangy from the cream cheese. The candy coating adds a sweet, creamy finish.
Texture:
Soft and fudgy inside with a smooth, firm shell outside.
Occasion:
Perfect for Halloween parties, kids’ school events, dessert tables, or no-bake projects at home.
Prep Time: 30 minutes
Cook Time: 0 minutes
Chill Time: 20 minutes
Total Time: 50 minutes
Notes
If you want to make them nut-free, be sure to avoid any peanut butter Oreos or nut-based toppings. These Oreo balls can be made ahead and frozen without the chocolate coating. When ready to use, thaw slightly and coat with melted candy. Use different candy melt colors to fit other holidays too. Think red and green for Christmas or pink and white for Valentine’s Day.
Nutritional Information (Per Serving)
| Nutrient | Amount per ball |
|---|---|
| Calories | 110 |
| Fat | 6g |
| Saturated Fat | 3g |
| Unsaturated Fat | 2g |
| Trans Fat | 0g |
| Carbohydrates | 12g |
| Sugar | 9g |
| Fiber | 0g |
| Protein | 1g |
| Sodium | 60mg |
| Cholesterol | 5mg |
Frequently Asked Questions (FAQ)
What are fun Halloween treats for kids’ school events?
Halloween Oreo Balls are ideal. They’re no-bake, easy to pack, and fun to decorate with kids.
Can I make these nut-free?
Yes. Just avoid nut-based Oreos and toppings. Always check ingredient labels if allergies are a concern.
Can kids help decorate?
Absolutely. Let them add candy eyes, sprinkles, and drizzle colored chocolate. It’s safe and engaging.
Can I freeze them after dipping?
You can, but be aware that condensation may dull the chocolate coating. For best results, freeze undecorated.
What’s the best chocolate for coating?
Use candy melts or high-quality baking chocolate. Chocolate chips are not recommended as they don’t melt smoothly.
Storage Instructions
Refrigerate the Halloween Oreo Balls in an airtight container for up to five days. If freezing, store them undipped in a freezer-safe bag for up to three months. When ready to serve, thaw slightly and dip in fresh candy melts. For school events, keep them chilled with an ice pack in lunchboxes or coolers.
Related Recipes
If you loved these Halloween Oreo Balls, you’ll also enjoy:
- Dubai Chocolate Rice Krispie Treats
- Cookie Monster Cookies
- Pop Tart Cookie Bars
- Dubai Chocolate Donut
- Blueberry Lemon Banana Bread

Halloween Oreo Balls | Cute and Easy Halloween Treats for Kids and Parties
- Total Time: 30 minutes
- Yield: 30 balls 1x
- Diet: Vegetarian
Description
Halloween Oreo Balls are adorable, no-bake treats made with Oreos, cream cheese, and candy melts. Perfect for parties, school events, and Halloween fun.
Ingredients
36 Oreo cookies
8 oz cream cheese, softened
12 oz candy melts or white chocolate
Candy eyes, sprinkles, or mini chocolate chips
Gel food coloring (optional)
Parchment paper
Instructions
1. Crush Oreos into fine crumbs.
2. Mix with softened cream cheese until smooth.
3. Roll into 1-inch balls and place on parchment.
4. Freeze for 20 minutes.
5. Melt candy melts or chocolate.
6. Dip each ball and shake off excess.
7. Decorate with eyes, sprinkles, or drizzle.
8. Chill until set.
Notes
Chill balls thoroughly before dipping. Add coconut oil to white chocolate for smoother coating. Store in the fridge for up to 5 days or freeze undipped for 3 months.
- Prep Time: 30 minutes
- Cook Time: 0 minutes
- Category: Dessert
- Method: No-Bake
- Cuisine: American
Nutrition
- Serving Size: 1 ball
- Calories: 110
- Sugar: 9g
- Sodium: 60mg
- Fat: 6g
- Saturated Fat: 3g
- Unsaturated Fat: 2g
- Trans Fat: 0g
- Carbohydrates: 12g
- Fiber: 0g
- Protein: 1g
- Cholesterol: 5mg
Conclusion
Halloween Oreo Balls are everything a Halloween treat should be—cute, creative, chocolatey, and a whole lot of fun. Whether you’re prepping for a party, packing snacks for school, or simply looking to make lasting memories with your kids in the kitchen, this recipe delivers every time. Give it a try, let your imagination run wild with decorations, and don’t forget to share your spooky creations in the comments!